Integration Guide: Plana and Payhawk
This guide provides a step-by-step approach to setting up and using the integration between Odoo and Payhawk, ensuring seamless expense categorization and synchronization. Below are the key steps and functionalities:
Setup and Configuration
1. Accessing Payhawk Integration Settings
- Navigate to the Invoicing Module in Odoo.
- Open the Configuration Menu to find under Payhawk Category:
- Payhawk Settings
- Sync Log (shows technical data passed between systems).

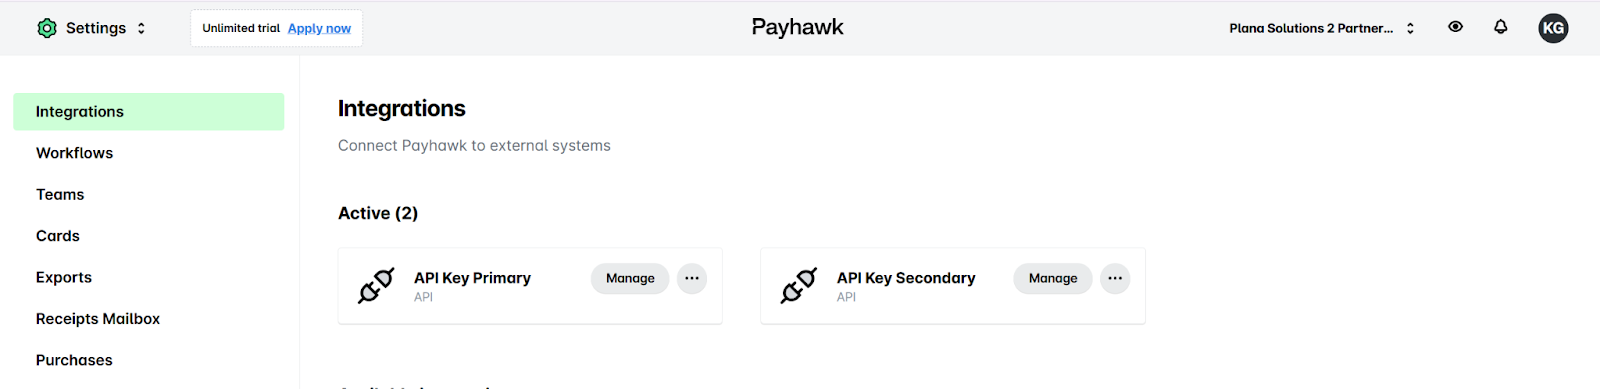
- In Payhawk:
- Go to Settings > Integrations and manage your API keys.
- Copy the API key.
- In Odoo:
- Paste the API key in the corresponding field in Payhawk Settings.
- Save to connect both systems.

3. Configuring Invoices and Receipts Journals
- Assign different accounting journals in Odoo for invoices and receipts coming from Payhawk.
4. Setting up Fund Accounts
- Fund accounts in Payhawk (representing available money) are automatically generated as corresponding bank account journals in Odoo.
Expense Products
1. Overview
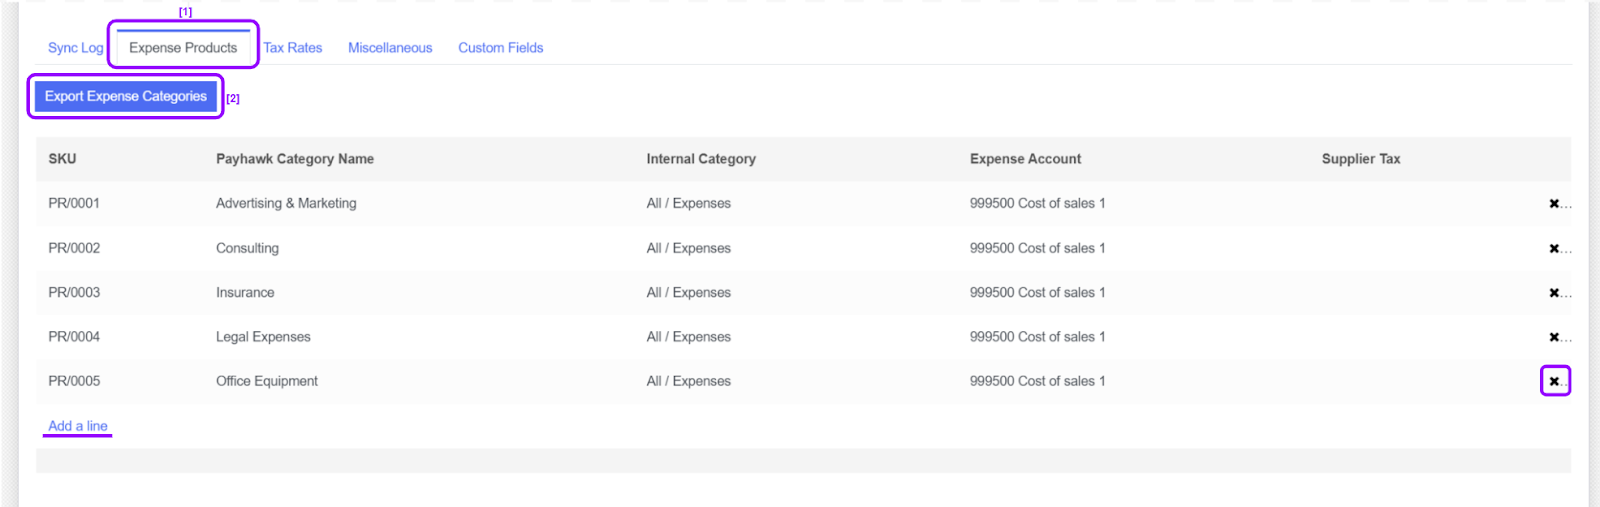
- Navigate to the Expense Products Tab in Odoo.
- Define the list of products to appear in Payhawk with details:
- SKU Number
- Payhawk Category Name
- Internal Category
- Expense Account
2. Manual Synchronization
- Edit the list of expense products as needed.
- Export expense categories to an Excel file by clicking the Export Expense Categories button.
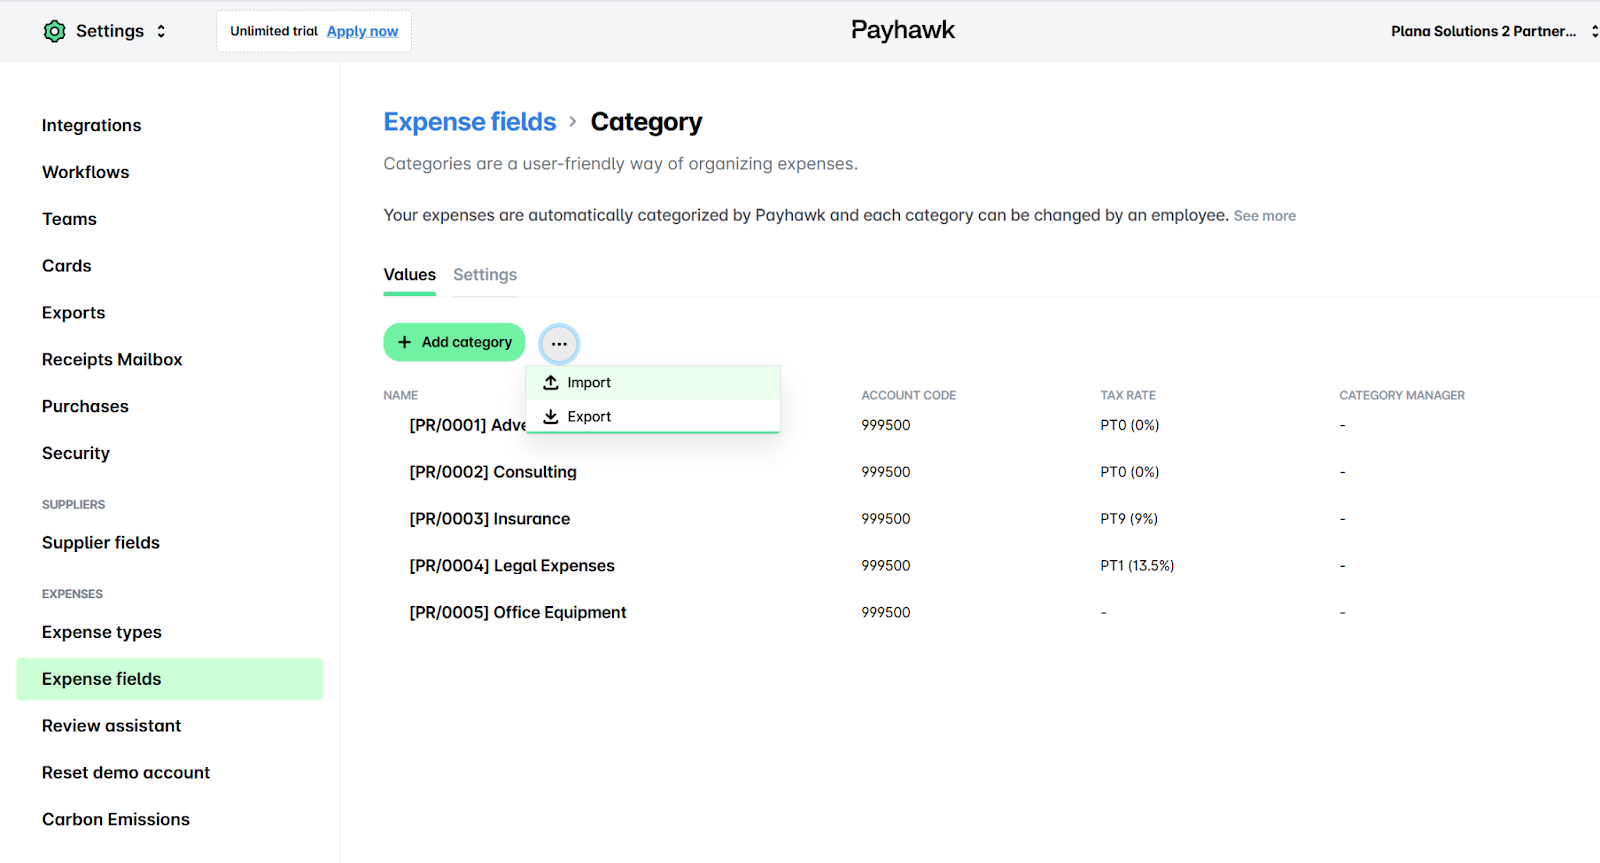
- Import the file into Payhawk via Settings > Expense Fields > Categories.
Synchronization Details
1. Automatic Synchronization
- All fields, except the Expense Products synchronize automatically on a timed basis, which can be adjusted.
2. Two-Way Synchronization
- Supplier information is synchronized both ways:
- Vendors created in Odoo are replicated in Payhawk.
- Suppliers created in Payhawk appear in Odoo.
3. Other Synchronizable Fields
- Tax Rates
- Chart of Accounts
- Departments
- Analytic Accounts and Tags
- Bank Statements
Managing Expenses
1. Creating an Expense in Payhawk
- Navigate to Expenses and click New.
- Upload the invoice document.
- Fill in required fields:
- Payment Method: (e.g., Company Cash)
- Reason for Payment
- Supplier (ensure correct match to avoid duplicates).
- Category (linked to Odoo Expense Products).
- Analytic Tags, Accounts, and Projects.
- Invoice Information (date, type, number, etc.).
- Amount (validate system-filled values).
- Submit the expense.

2. Supervisor Review
- Expenses must be reviewed and approved by a supervisor before synchronization with Odoo.
Receiving Expenses as Vendor Bills in Odoo
1. Vendor Bills in Odoo
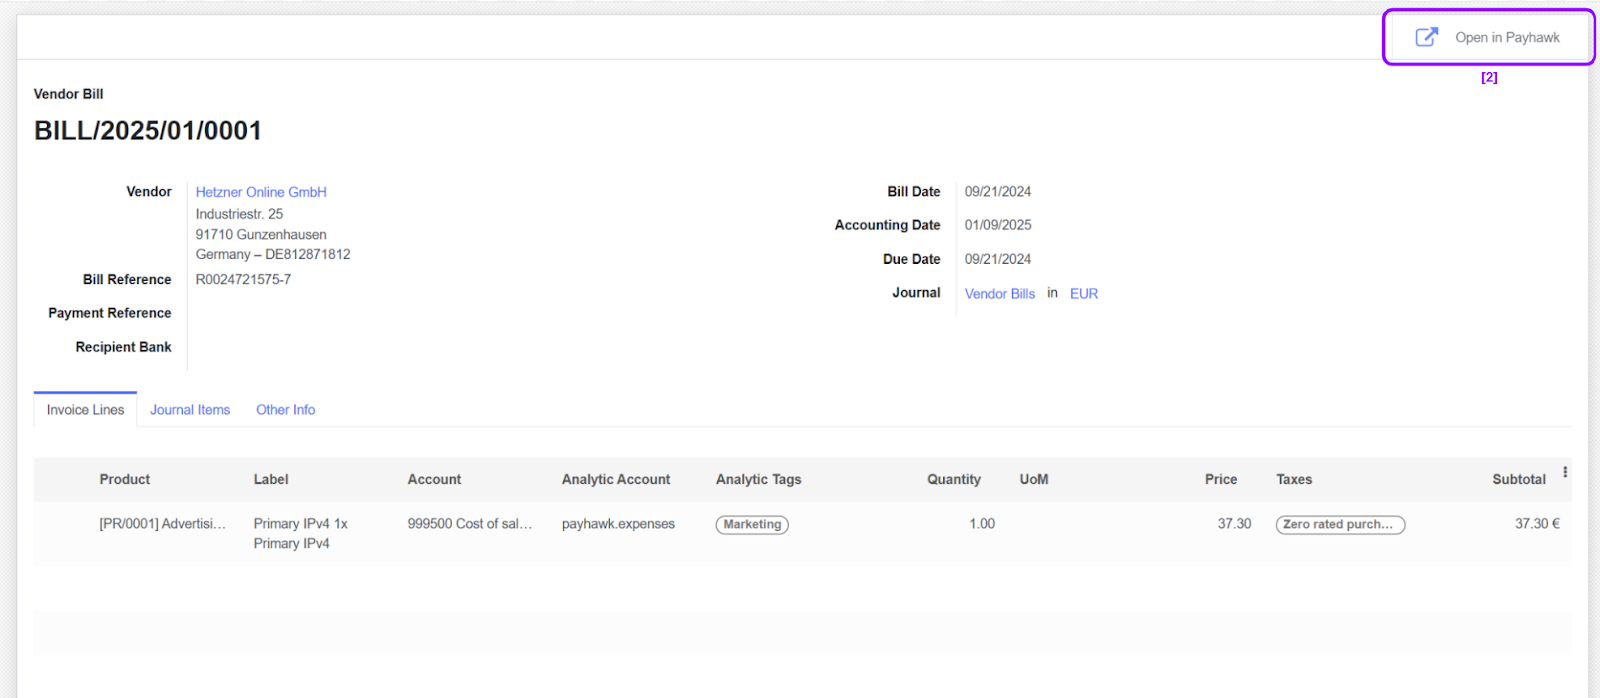
- Once approved in Payhawk, the expense appears in Odoo as a vendor bill.
- Details include:
- Vendor
- Categorization (e.g., Advertising and Marketing)
- Analytic Information
- Invoice Attachments
2. Accessing Linked Data
- Invoices in Odoo include quick-access links to:
- The original expense in Payhawk.
- Attached invoice documents.
Summary
This guide covered:
- Configuration of the integration between Odoo and Payhawk.
- Setting up synchronization for expense categories, tax rates, and other fields.
- Managing and approving expenses in Payhawk.
- Viewing and validating synced data in Odoo.
Follow these steps to ensure a smooth and efficient integration process. For a more detailed walkthrough, check out the accompanying video on YouTube.